These days, websearch family started
attacking again. If you find your browser hijacked by some websites like websearch.goodfindings.info,
Websearch.simple2search.info, or Websearch.searchingissme.info, you should be
on alert. This post may offer you details about websearch.goodfindings.info. You
are welcomed to read for more information.
What is Websearch.goodfindings.info?
Websearch.goodfindings.info is classified
as a browser hijacker that can infect almost all the browsers, such as Internet
Explorer, Mozilla Firefox or Google Chrome. Once infected, it will redirect you
to its domain where you can find strange search bar rather your default
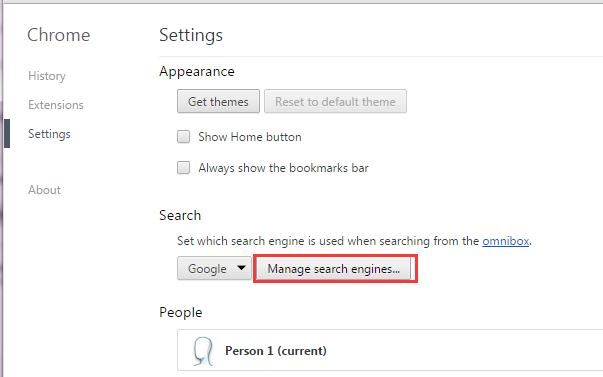
homepage. Here is a screenshot of this browser hijacker.

Websearch.goodfindings.info is
rejected by many computer users. The biggest problem caused by this website is
taking over your whole browser with its junk cookies. Once infected, you may
not experience enjoyable internet browsing any longer. Besides, it promotes a
lot of sponsored products or services in the search result page. It aims at
drawing pay-per-click revenues. So you may find many sponsored links on the webpage
offered by this website. This website is often designed to prevent easy removal
in order to protect the income it generates. The best way to completely get rid
of this browser hijacker is remove it manually.
Websearch.goodfindings.info is
often bundled with other software. You will install it if you agree all the
requirements and keep clicking OK when you install certain software. You’d
better choose custom installation to stop this suspected website.
Guides to remove Websearch.goodfindings.info
This website is unwanted
and useless for computer users. You are highly recommended to remove it from
your computer. You can remove it either manually or automatically. Here are
some suggestions offered.
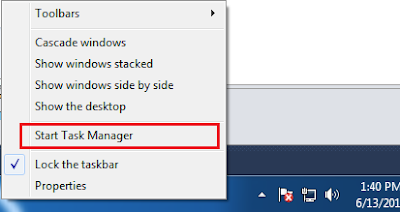
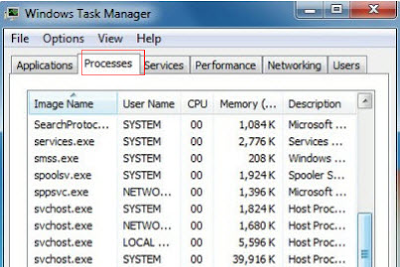
Step
1: End suspicious process in Windows Task Manager.
Right click the blank Windows Taskbar and
select Start Task Manager to open. If your IE is infected and stuck in Websearch.goodfindings.info,
you should end the main iexplorer.exe. FF and Chrome are respectively
corresponding to firefox.exe and chrome.exe.
Step
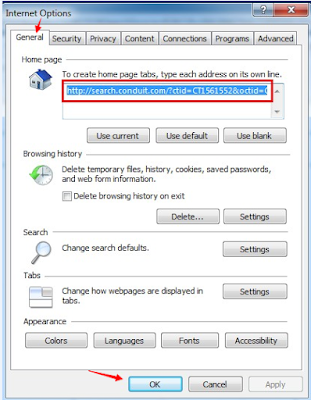
2: Erase Websearch.goodfindings.info from IE.
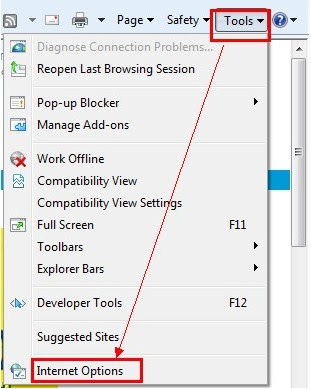
Open Internet Explorer, then click on the gear icon (Tools for Windows XP users) at the top (far right), then select Manage add-ons.
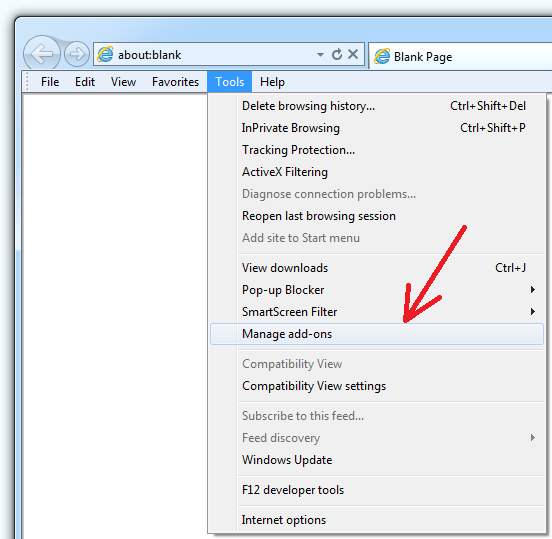
Navigate to Search Providers, remove Websearch.goodfindings.info from the list and enable the one you want.
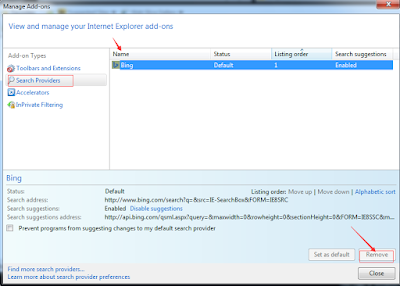
Open Internet Explorer, then click on the gear icon (Tools for Windows XP users) at the top (far right), then select Manage add-ons.
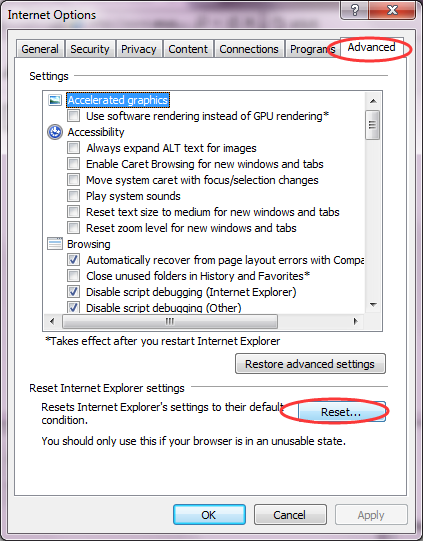
Follow the pictures below to get back your Home Page. If you fail to remove this website, you can reset your browser settings.
Delete random URL in the homepage box and type in www.google.com or other.
Step
3: Delete Websearch.goodfindings.info from FF.
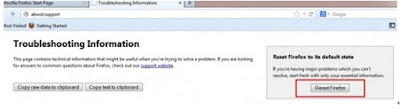
Open Firefox, press Alt + H, and select Troubleshooting Information > Refresh...
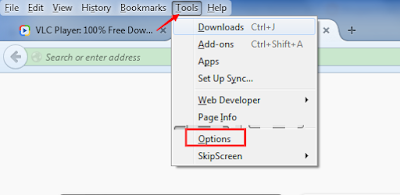
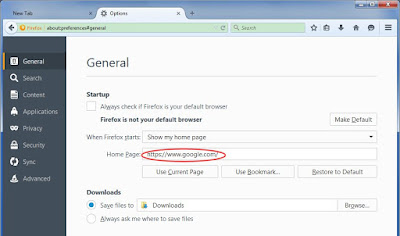
Open Firefox, simultaneously tap Alt+T keys and select Options. Click the General tab and move to the Home Page. Type in www.google.com or other. and click OK.
Open Firefox, press Alt + H, and select Troubleshooting Information > Refresh...
Step
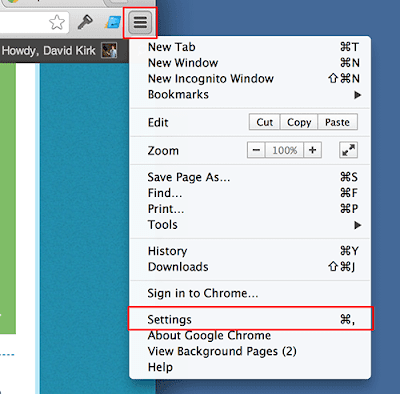
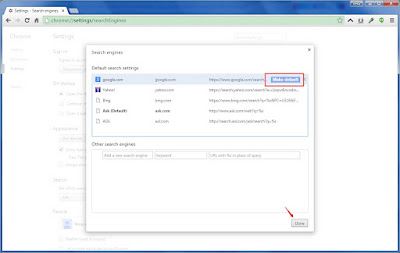
4: Erase Websearch.goodfindings.info from Chrome.
Suggestion 3: Automatically Remove Websearch.goodfindings.info with SpyHunter
SpyHunter has the ability to detect and remove rootkits, which are used to stealth install rogue anti-spyware programs and other trojans. It is designed to assist the average computer user in protecting their PC from malicious threats. Maybe the inexperience users can get help from it. If you find it hard to remove with the manual removal instruction, you can also use this automatic removal tool.


SpyHunter responds with advanced technology to stay one step ahead of today’s malware threats. It offers additional customization capabilities to ensure every user is able to custom tailor this anti-malware application to fit their specific needs. It is great if you remove the threats on your own. If you cannot make it yourself, SpyHunter will be another choice for you.
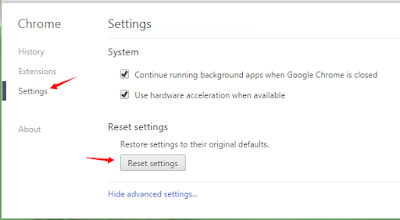
Click on the Customize icon(wrench or 3 bar icon) next to the address bar. Select Settings from the drop-down list and then navigate to Search > Manage search engines…Click X on the URL of the search tool you want to remove. Click Done.
Find Show advanced settings...and then go to Reset settings.
Suggestion 3: Automatically Remove Websearch.goodfindings.info with SpyHunter
SpyHunter's free scanner is for malware
detection. You have the choice of buying SpyHunter for malware removal. Here are some install procedures for it. You can read it for reference.
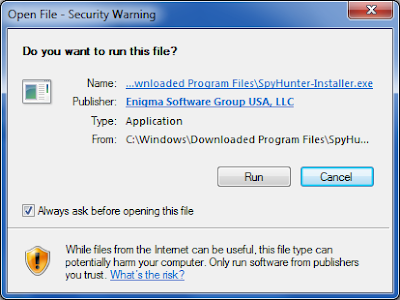
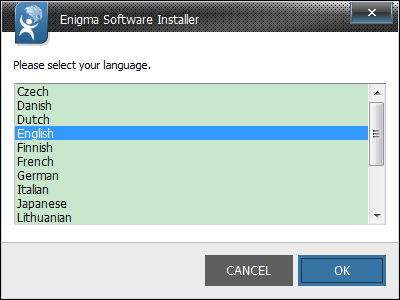
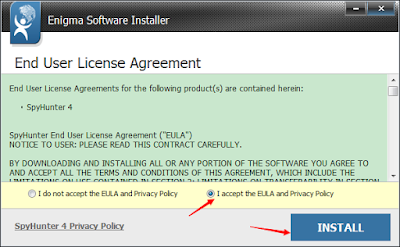
Step 1: After finishing downloading, click Run to install SpyHunter step by step.
...
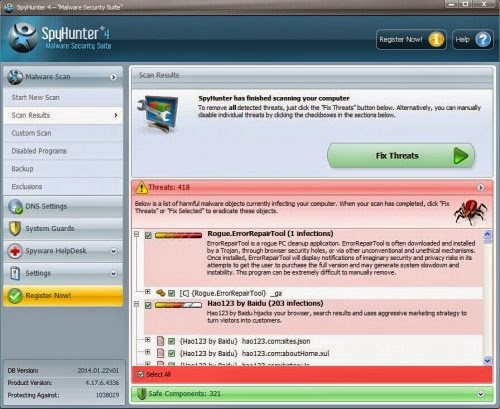
Step 2: After finishing installing, SpyHunter will scan and diagnose your entire system automatically.
Step 3: As the scanning is complete, all detected threats will be listed out. Then, you can click on “Fix Threats” to remove all of the threats found in your system.
Good to know:
No comments:
Post a Comment