What Is Ultra Notifier?
Ultra Notifier is classified as an adware which get itself attached to almost all the web browser like Internet Explorer, Firefox, Google Chrome, Safari, etc. with this Ultra Notifier ads on your computer, it can display you annoying coupons, price comparisons, sponsored links, banners, etc.
Ultra Notifier is technically not a virus but it does seem intrusive, usually it can get into your computer via free software downloads, visiting questionable websites, sharing malicious files with other users online, opening spam email attachments, using infected external hard drive, etc. as we all know, this kind of adware is designed by cyber hackers to increase web traffic and generate profit from it, to achieve its purpose, it can track and store your online traces like search keywords, favorites, bookmarks or browser history, which will violate your privacy and may steal your personal information.
Potential Risks of Having Ultra Notifier on Your Computer
- It can slow down your overall computer performance and gets into your computer without your knowledge.
- It can collect your online traces to sell to the third party.
- More useless toolbars or browser extensions will be invited to come to your computer.
- It can modify your default system settings and make your system vulnerable for other malware.
If you don’t have enough experience in handling cookies, browser extensions, you are welcome to follow the removal guide listed below:
Step by Step Guide to Manually Remove Ultra Notifier
Step 1- Remove add-ons:
Internet Explorer
1) Go to 'Tools' → 'Manage Add-ons';
2) Choose 'Search Providers' → choose 'Bing' search engine or 'Google' search engine and make it default;
3) Select 'Search Results' and click 'Remove' to remove it;
4) Go to 'Tools' → 'Internet Options', select 'General tab' and click 'Use default' button or enter your own website, e.g. Google.com. Click OK to save the changes.
Google Chrome
1) Click on 'Customize and control' Google Chrome icon, select 'Settings';
2) Choose 'Basic Options'.
3) Change Google Chrome's homepage to google.com or any other and click the 'Manage search engines...' button;
4) Select 'Google' from the list and make it your default search engine;
5) Select 'Search Results' from the list remove it by clicking the "X" mark.
Mozilla Firefox
1) Click on the magnifier's icon and select 'Manage Search Engines....';
2) Choose 'Search Results' from the list and click 'Remove' and OK to save changes;
3) Go to 'Tools' → 'Options'. Reset the startup homepage or change it to google.com under the 'General tab';
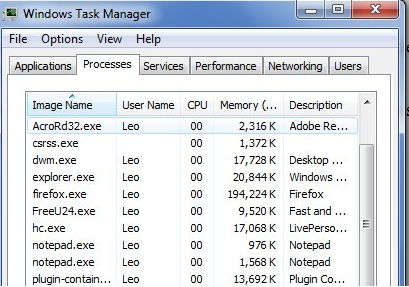
Step 2- Open Windows Task Manager and close all running processes.
( Methods to open Task Manager: Press CTRL+ALT+DEL or CTRL+SHIFT+ESC or Press the Start button->click on the Run option->Type in taskmgr and press OK.)
%AllUsersProfile%\Application Data\.dll
%AllUsersProfile%\Application Data\.exe
%ProgramFiles%\random.exe
Step 4- Open the Registry Editor and delete the following entries:
(Steps: Hit Win+R keys and then type regedit in Run box and click on OK)

HKEY_CURRENT_USERSoftwareMicrosoftWindowsCurrentVersionRun
HKEY_CURRENT_USER\AppEvents\Schemes\Apps\Explorer\Navigating
Step 5-Restart your computer normally to check the effectiveness.
Method two: automatically remove Ultra Notifier with SpyHunter antivirus.
SpyHunter is a powerful, real-time anti-spyware application that designed to assist the average computer user in protecting their PC from malicious threats like worms, Trojans, rootkits, rogues, dialers, spyware, etc. It is important to notice that SpyHunter removal tool works well and should run alongside existing security programs without any conflicts.
Step 1. Download SpyHunter by clicking on the icon below.

Step 2. Follow the details to complete the installation process. (Double click on the download file and follow the prompts to install the program.)


Step 3. After the installation, run SpyHunter and click “Malware Scan” button to have a full or quick scan on your computer.

Step 4. Tick "Select all" and press "Remove" button to get rid of all the detected threats on your computer.

Please be careful that the manual clean requires expert skills to handle. If you’re not that computer savvy, it will be very risky to process the instructions above on your own. To get Ultra Notifier resolved safer and quicker, you're advised to download Spyhunter – the famous antivirus software here to save your time and remove all the possible malware infection completely from your system.
>>Scan Your PC and Remove Ultra Notifier For Free!
>>Download Ultra Notifier Automatic Remover Here!
SpyHunter is a powerful, real-time anti-spyware application that designed to assist the average computer user in protecting their PC from malicious threats like worms, Trojans, rootkits, rogues, dialers, spyware, etc. It is important to notice that SpyHunter removal tool works well and should run alongside existing security programs without any conflicts.
Step 1. Download SpyHunter by clicking on the icon below.
Step 2. Follow the details to complete the installation process. (Double click on the download file and follow the prompts to install the program.)
Step 3. After the installation, run SpyHunter and click “Malware Scan” button to have a full or quick scan on your computer.
Step 4. Tick "Select all" and press "Remove" button to get rid of all the detected threats on your computer.
Please be careful that the manual clean requires expert skills to handle. If you’re not that computer savvy, it will be very risky to process the instructions above on your own. To get Ultra Notifier resolved safer and quicker, you're advised to download Spyhunter – the famous antivirus software here to save your time and remove all the possible malware infection completely from your system.
>>Scan Your PC and Remove Ultra Notifier For Free!
>>Download Ultra Notifier Automatic Remover Here!
No comments:
Post a Comment