What is Adware Installer Activity 7?
Adware Installer Activity 7 is classified as an adware program that can seriously compromise your computer system. It gets into your computer stealthily via downloading free applications from dubious websites. Once installed, it will always pop up advertisements on the site that you visit and disturb your online activity.
Commonly, this annoying adware is usually related to a specific Web site that is cached in the Web browser. In some cases, it changes the home page of your Web browser to point to a specific Web site. Since adware is not malicious in nature, it is not considered a virus. however, this suspected adware infection cannot only deliver the random ads but also secretly gather personal information through the Internet and relay it back to another computer, which is done by tracking browsing habits, generally for advertising purposes. What's worse, the appearance of this nasty adware may cause slow PC performance, malware attacks, or even system crashes.
In short, Adware Installer Activity 7 could pose a serious security threat. You should take immediate action to stop any damage or prevent further damage from happening.
The following passage will provide some useful removal guide to help you get rid of Adware Installer Activity 7 on your computer. Please learn more and have a try.
If you encounter any difficulty in removing this adware, you are recommended to use Powerful SpyHunter Anti-Malware/Spyware to fix your computer.
>> Click Here for Quick and Efficient Removal Tool <<
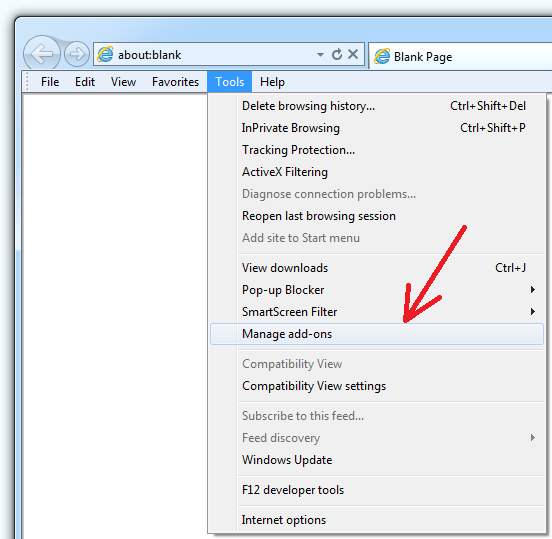
Step 6: Erase unwanted extensions/add-ons from web browser.
Internet Explorer
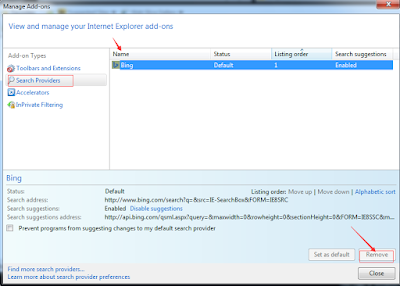
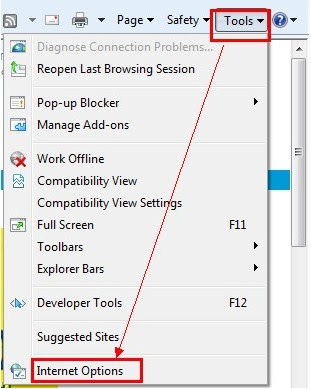
Open Internet Explorer, then click on the gear icon (Tools for Windows XP users) at the top (far right), then select Manage add-ons.
Navigate to Toolbars and Extensions, remove SupTap from the list and enable the one you want.
How to Remove Adware Installer Activity 7 Completely and Safely?
The following passage will provide some useful removal guide to help you get rid of Adware Installer Activity 7 on your computer. Please learn more and have a try.
If you encounter any difficulty in removing this adware, you are recommended to use Powerful SpyHunter Anti-Malware/Spyware to fix your computer.
>> Click Here for Quick and Efficient Removal Tool <<
Suggestion 1: Watch Relevant Removal Video for Help
Suggestion 2: Manually Fix Problems Caused by Adware Installer Activity 7
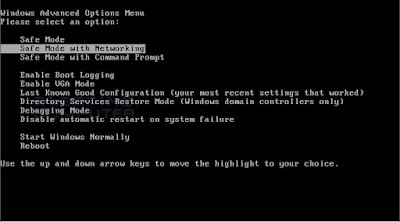
Step 1: Boot your computer into Safe Mode with Networking
Please be careful for this part and make sure you can handle it on your own. If not, you should follow the automatic removal guide.
Firstly, please restart your computer and before Windows interface loads, hit F8 key repeatedly. Choose “Safe Mode with Networking” option, and then press Enter key. System will load files and then get to the desktop in needed option.
Secondly, you can follow these steps to get rid of ”SOS.Messaging has stopped working” manually: it’s to end virus related processes, search and remove all other relevant files and registry entries. Follow the removal guides below to start.
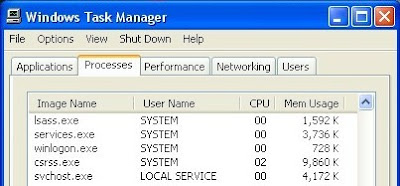
Step 2: End suspicious process in Windows Task Manager.
Launch Windows Task Manager by pressing keys Ctrl+Alt+Del or Ctrl+Shift+Esc, search for ”SOS.Messaging has stopped working” processes and right-click to end them.
Step 3: Remove unwanted program or adware from Control Panel.
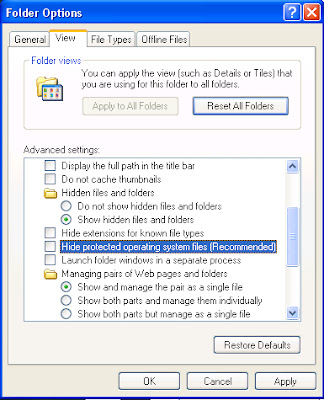
Open Control Panel in Start menu and search for Folder Options. When you’re in Folder Options window, please click on its View tab, check Show hidden files and folders and uncheck Hide protected operating system files (Recommended) and then press OK.
Click on the “Start” menu and then click on the “Search programs and files” box, Search for and delete these files created by malware (sample):
%AppData%\<random>.exe
%CommonAppData%\<random>.exe
Step 5: Delete or edit Windows Registry.
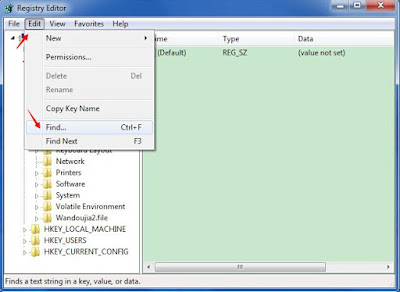
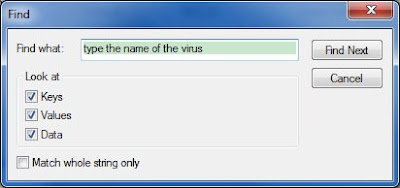
Open Registry Editor by pressing Windows+R keys, type regedit in Run box and click “OK” to proceed. When Registry Editor is open, search and get rid of all the malicious registry entries:

Thirdly, reboot the computer normally to check whether the virus is completely removed or not.
Please be careful for this part and make sure you can handle it on your own. If not, you should follow the automatic removal guide.
Firstly, please restart your computer and before Windows interface loads, hit F8 key repeatedly. Choose “Safe Mode with Networking” option, and then press Enter key. System will load files and then get to the desktop in needed option.
Step 2: End suspicious process in Windows Task Manager.
Launch Windows Task Manager by pressing keys Ctrl+Alt+Del or Ctrl+Shift+Esc, search for ”SOS.Messaging has stopped working” processes and right-click to end them.
Windows 8 & Windows 8.1
- Slide the mouse cursor to the bottom right corner of your screen.
- Click Settings on the Charm bar and go to Control Panel.
- Select Uninstall a program and remove unwanted program.
Windows Vista & Windows 7
- Open the Start Menu and click Control Panel.
- Go to Uninstall a program and remove
Windows XP
- Open the Start menu and navigate to Control Panel.
- Select Add or Remove Programs and uninstall unwanted program.
Open Control Panel in Start menu and search for Folder Options. When you’re in Folder Options window, please click on its View tab, check Show hidden files and folders and uncheck Hide protected operating system files (Recommended) and then press OK.
%AppData%\<random>.exe
%CommonAppData%\<random>.exe
C:\Program Files
C:\Documents and Settings
Step 5: Delete or edit Windows Registry.
Open Registry Editor by pressing Windows+R keys, type regedit in Run box and click “OK” to proceed. When Registry Editor is open, search and get rid of all the malicious registry entries:
Thirdly, reboot the computer normally to check whether the virus is completely removed or not.
Step 6: Erase unwanted extensions/add-ons from web browser.
Internet Explorer
Open Internet Explorer, then click on the gear icon (Tools for Windows XP users) at the top (far right), then select Manage add-ons.
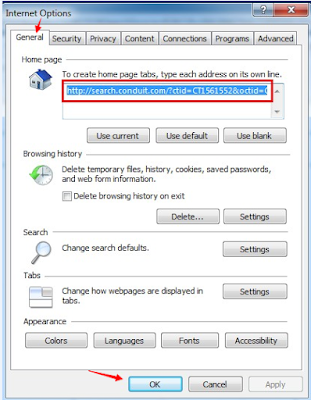
Follow the pictures below to get back your Home Page. If you fail to remove this website, you can reset your browser settings.
Delete random URL in the homepage box and type in www.google.com or other.
Mozilla Firefox
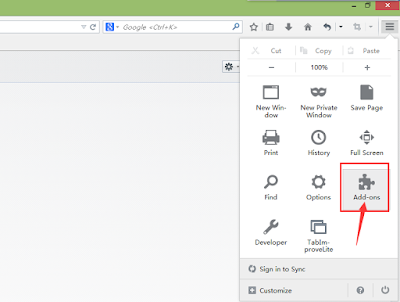
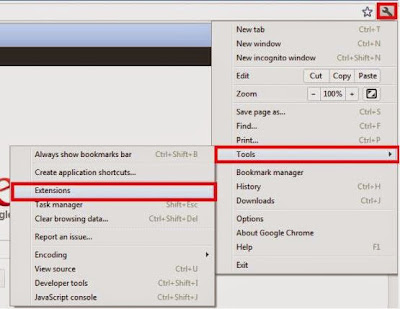
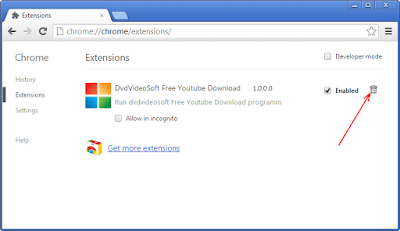
Click on the button at the top right corner to open Menu > Add-ons > Extensions
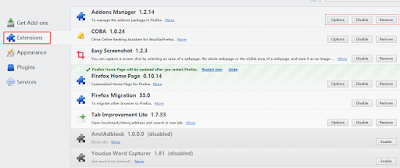
Find suspicious related add-ons and delete them.
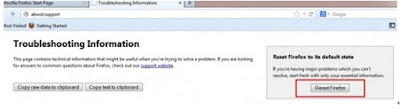
Open Firefox, press Alt + H, and select Troubleshooting Information > Refresh...
Click on the button at the top right corner to open Menu > Add-ons > Extensions
Find suspicious related add-ons and delete them.
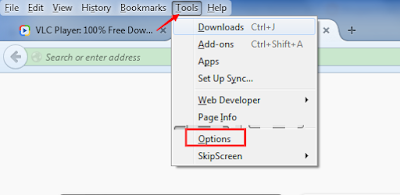
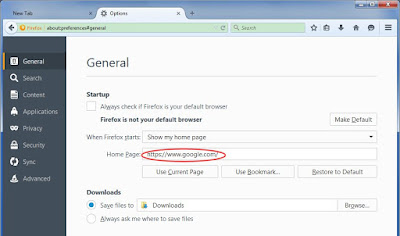
Open Firefox, simultaneously tap Alt+T keys and select Options. Click the General tab and move to the Home Page. Type in www.google.com or other. and click OK.
Open Firefox, press Alt + H, and select Troubleshooting Information > Refresh...
Google Chrome.
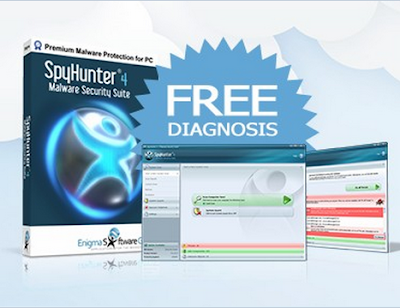
Suggestion 3: Automatically Remove Adware Installer Activity 7 with SpyHunter
SpyHunter has the ability to detect and remove rootkits, which are used to stealth install rogue anti-spyware programs and other trojans. It is designed to assist the average computer user in protecting their PC from malicious threats. Maybe the inexperience users can get help from it. If you find it hard to remove with the manual removal instruction, you can also use this automatic removal tool.


SpyHunter responds with advanced technology to stay one step ahead of today’s malware threats. It offers additional customization capabilities to ensure every user is able to custom tailor this anti-malware application to fit their specific needs. It is great if you remove the threats on your own. If you cannot make it yourself, SpyHunter will be another choice for you.
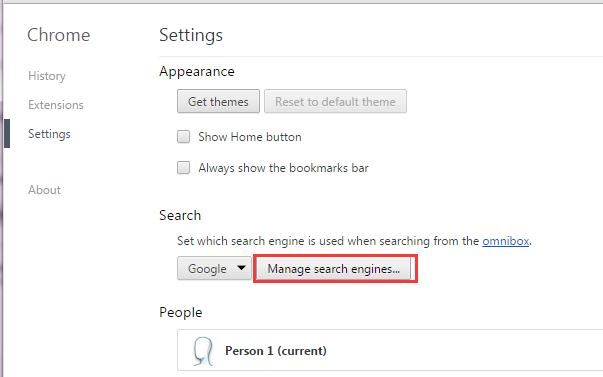
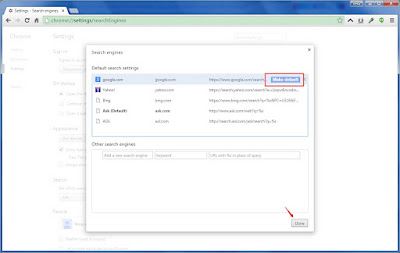
Click on the Customize icon(wrench or 3 bar icon) next to the address bar. Select Settings from the drop-down list and then navigate to Search > Manage search engines…Click X on the URL of the search tool you want to remove. Click Done.
Find suspicious related add-ons and delete them
Move to Search and click Manage search engines…Click X on the URL of the search tool you want to remove. Click Done.
Find suspicious related add-ons and delete them
Move to Search and click Manage search engines…Click X on the URL of the search tool you want to remove. Click Done.
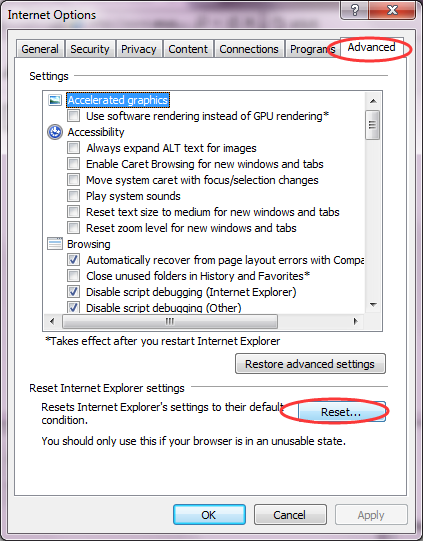
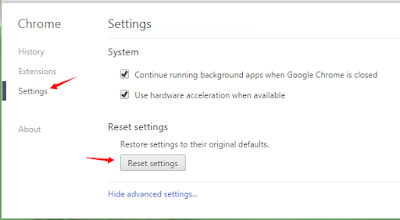
Find Show advanced settings...and then go to Reset settings.
Suggestion 3: Automatically Remove Adware Installer Activity 7 with SpyHunter
SpyHunter's free scanner is for malware
detection. You have the choice of buying SpyHunter for malware removal. Here are some install procedures for it. You can read it for reference.
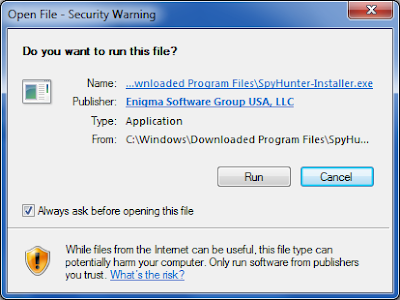
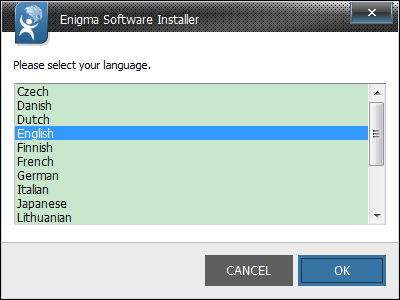
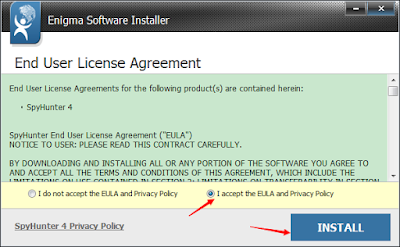
Step 1: After finishing downloading, click Run to install SpyHunter step by step.
...
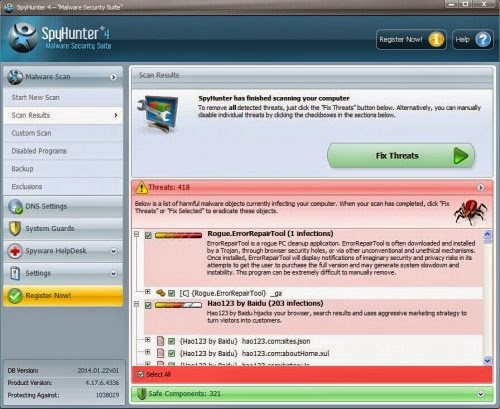
Step 2: After finishing installing, SpyHunter will scan and diagnose your entire system automatically.
Step 3: As the scanning is complete, all detected threats will be listed out. Then, you can click on “Fix Threats” to remove all of the threats found in your system.
Good to know:
No comments:
Post a Comment